Documentation
-
CMS Plugins
-
API | Developers
-
- Prochainement
-
Printers and Accessories
-
- GPRS connection settings SIM Card 2G 3G 4G
- Image and logo printing
- Internet connection
- Internet connection with a Ethernet cable (LAN RJ45)
- Mention "Printed using Expedy.io".
- Print PDF
- QR Code / Barcode
- QuickStart Cloud Printer 58mm
- QuickStart Installation Cloud Printer 80mm
- Send a test print request
- Tags Settings
- Text layout | Building a receipt ticket
- WiFi Setup
-
- Cloud Print Box: Ethernet cable and WiFi connection
- Connecting an ESC POS ticket printer to the Cloud Print Box adapter
- Image and logo printing
- Installing the Cloud Print USB Adapter
- Mention "Printed using Expedy.io".
- Print PDF
- QR Code / Barcode
- Send a test print request
- Tags Settings
- Text layout | Building a receipt ticket
-
General Terms
-
Expedy TMS
- Prochainement
-
Expedy M2M SIM Card
-
Raspberry Pi
-
Uber Eats printer
-
DoorDash Printer
-
Restaurant delivery platforms
Add a logo to the Shopify order form
How to add your company logo or name to the header of a receipt printed via Shopify
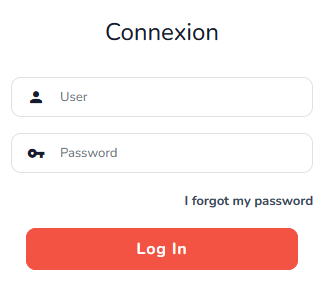
- Connect to Expedy Enter your username and password

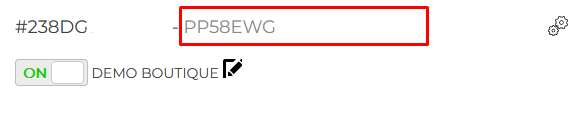
- Go to the “PRINTERS” section
- Select printer

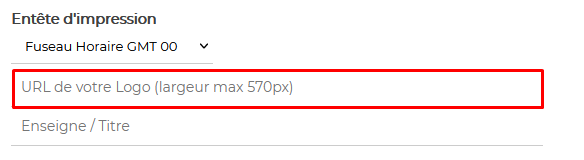
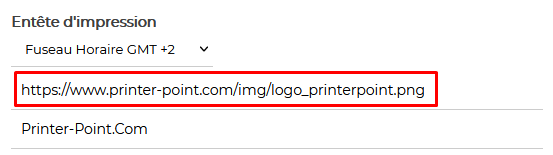
- In the PRINT HEADER section, add the URL of your image

Example:
NB: The image file must be hosted on a secure server (HTTPS)
Do not use images with an alpha layer (transparent background), prefer images without gradients in black and white. - Click on SAVE
Centering an image
To center an image, your logo must be positioned centered with an empty white margin to the left and right.
Here are some examples, depending on the width of the paper used.
![]()
![]()
![]()
Are you a Shopify expert?
Some Shopify users don’t have the skills required to install our solution themselves, which is why we’ve created a network of partners to provide them with help from a digital professional.
Join our Partner program and benefit from our users’ contacts.