Documentation
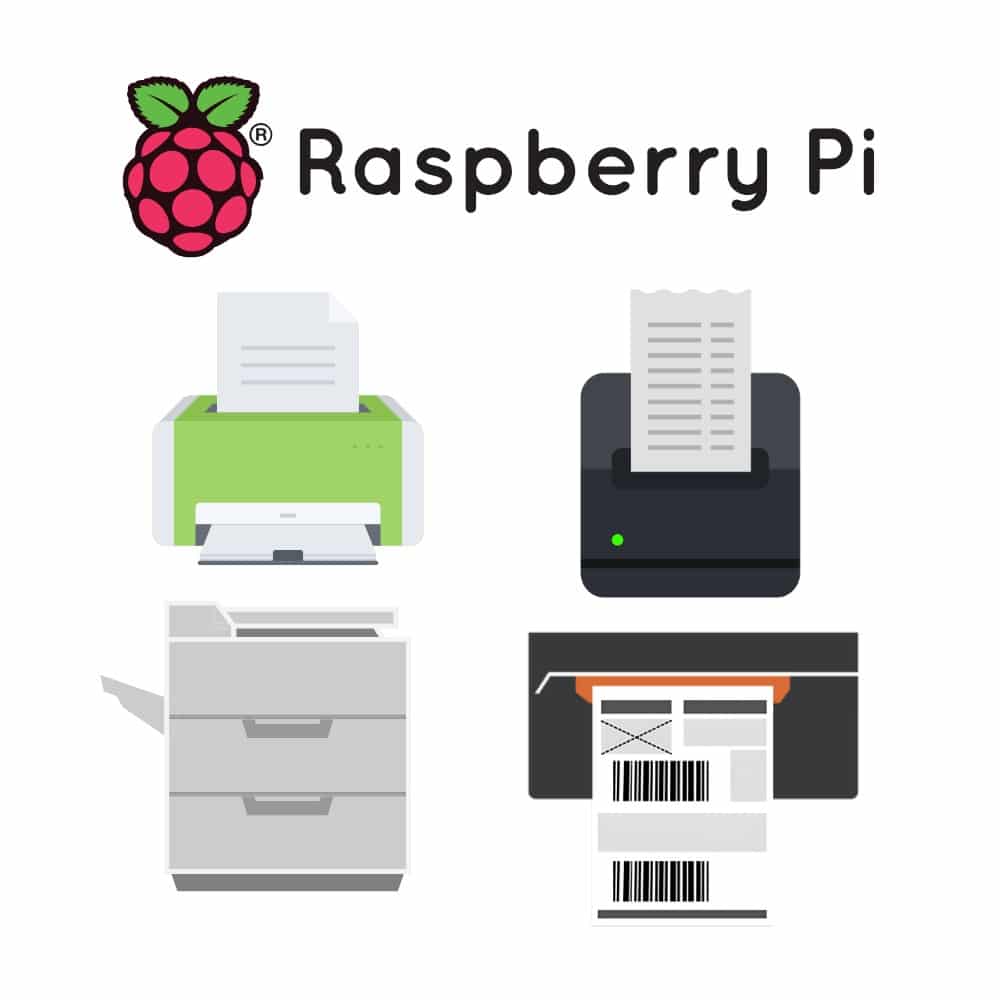
Installation on Raspberry Pi
You have purchased an Expedy Raspberry Pi SD card or the IMG.GZ download file, compatible with Raspberry Pi Zero and 4 nano computers, all versions. Thank you for your confidence! 😊
If you have a Raspberry Pi 1,2,3 or 5: contact us
If you have received a pre-installed SD card, proceed directly tostep 4.
1. Download file img.gz
2. Installing Raspberry Pi Imager :
Download link: https: //www.raspberrypi.com/software/

- Insert a new SD card into your computer with a minimum storage size of 8GB
- Raspberry Pi Device: Leave empty
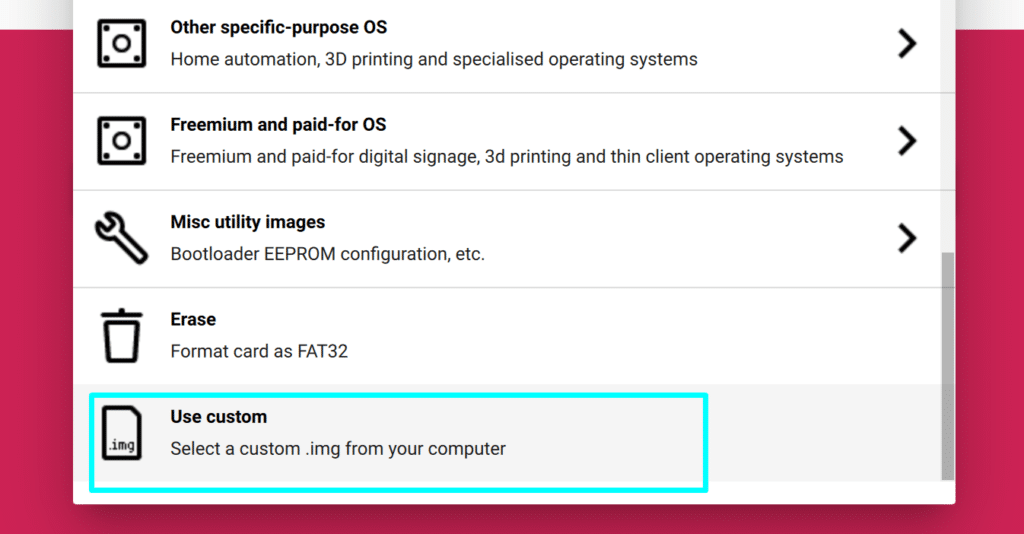
- Operating System : Choose Use Custom and select the img.gz file
- Storage: Select your SD card
- Start image creation (if RPI Image offers to apply custom settings) Select No)
3. Enter API key
- Insert the SD card into your computer
- Go to SD card on volume boot
- Edit the rpi_id.txt file and enter the unique RPI ID key received by email(Buy a key)
- Save the rpi_id.txt file and disconnect the SD card from your computer.
4. Start RPI
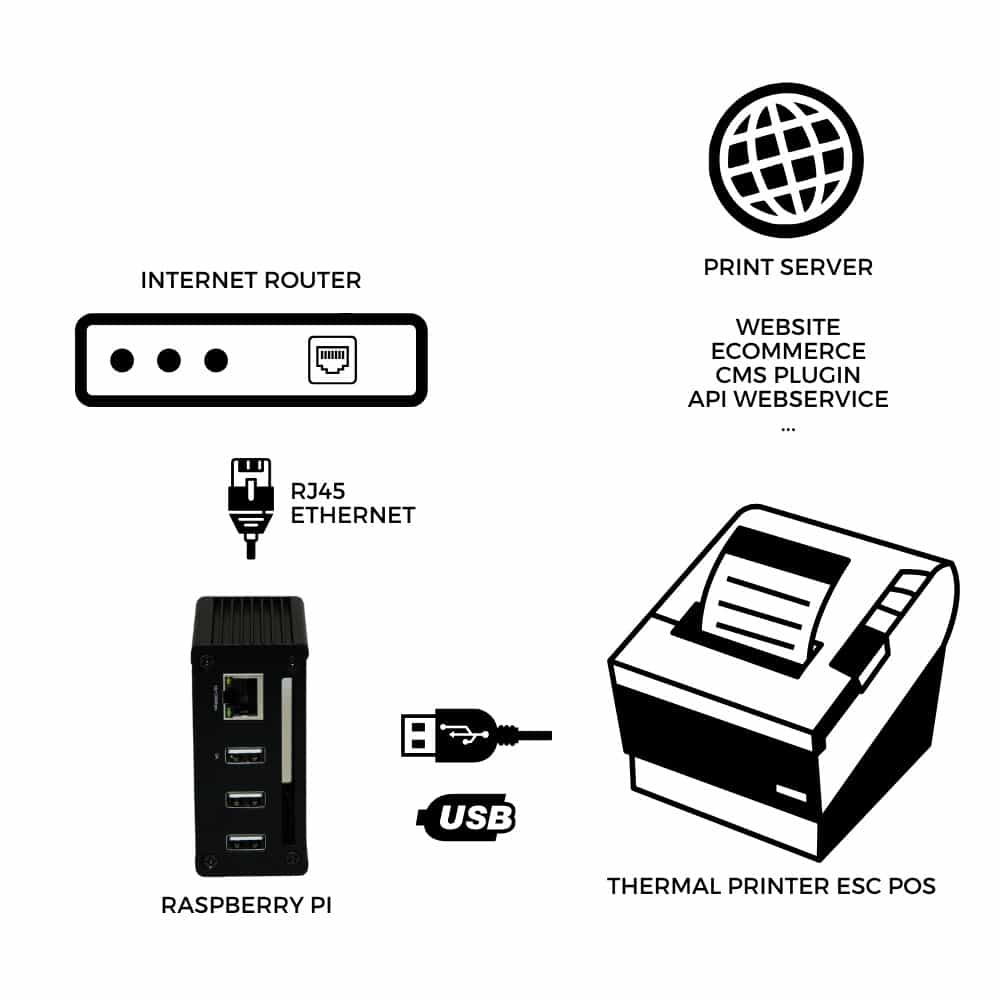
- Insert the SD card into the Raspberry Pi Zero or 4
- Connect the Raspberry Pi to the Internet via Ethernet network cable to the router/Internet box.
- Connect printer to USB1 port
- Powering up the Raspberry Pi
5. Printer settings
- Log on to https://www.expedy.fr/console/
- Go to section MACHINES SECTION then select the
- The PING should be displayed on the current date, indicating a successful connection to the Expedy server.
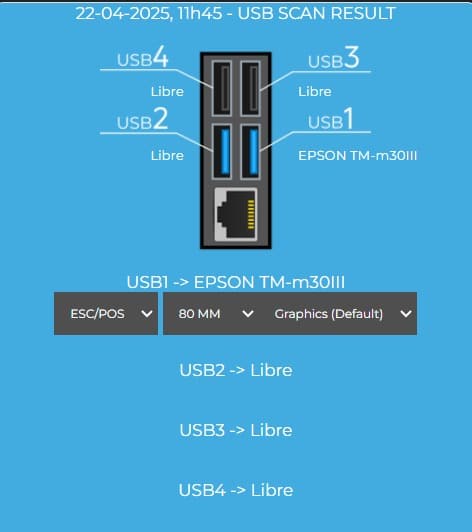
- In PRINT SERVICEclick on USB SCAN
- The printer should be displayed, select the printer type
ESC/POS Receipt printer with ESC/POS commands (Epson TM, Star TSP143…). Supported formats: TEXT, QRCODE, GTIN, JPG, BMP, PNG, PDF
ESC/POS communication is recommended, as it is standard and therefore requires no driver installation or configuration.
LABEL Other printers (photocopiers, laser, inkjet, labels, photos) – Install driver. Supported formats: JPG, BMP, PNG, PDF - Click on Save
6. Connect your application
- Code-free integrations: View applications
- Customized API integration
- How to create and layout a ticket
Frequently asked questions
- Why doesn’t the ping give the current date?
- Check network connection
- Check that the RPI ID key has been entered correctly in the rpi_id.txt file.
- Check that ports 1883 are open on your Internet router. Ask your network provider if you don’t have router access. This opening is optional, as standard Internet boxes already have these ports open by default.
- The Raspberry Pi is connected to the Internet and the printer is recognized, but why doesn’t anything print?
- Check that API requests in PRINTERS > Select Printer > View PRINT JOBS HISTORY
- Check the USB connection on the USB1 port. Plugins and Zapier only use the USB1 port by default. In custom development, you can modify the code to send to the desired USB port and use up to 4 printers on the same Raspberry Pi.
- Is it possible to connect the Raspberry Pi to the Internet via WiFi?
- Yes, you can use WiFi, but this type of con
For further information, please contact us
![]() Français (French)
Français (French) ![]() English
English ![]() Español (Spanish)
Español (Spanish) ![]() Deutsch (German)
Deutsch (German) ![]() Italiano (Italian)
Italiano (Italian) ![]() Português (Portuguese (Portugal))
Português (Portuguese (Portugal))